A little more information on the lighting, and a quick article concerning the tray for the top shelf.
About 5 minutes after finishing part 3 of this series, I was filing the folder for that article when I found the additional photos I took as part of the lighting design...
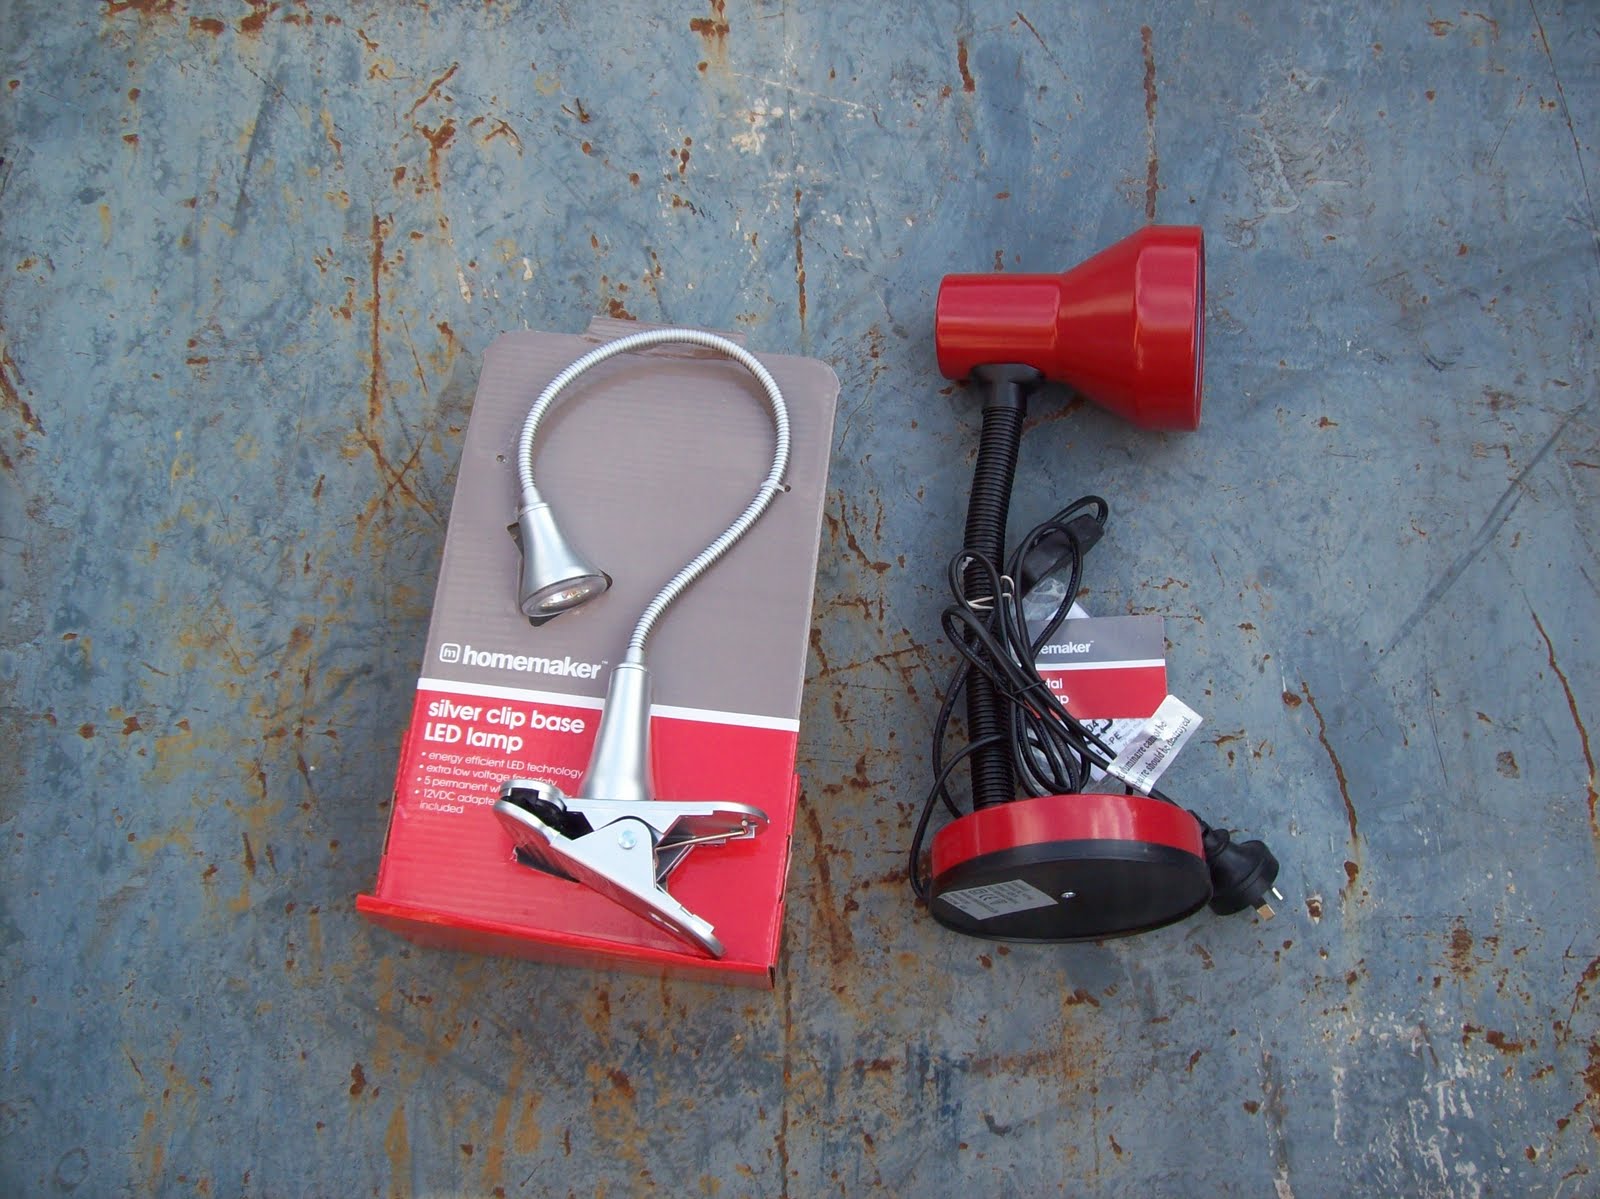
 |
| Figure 1 - Lamps tested for use in the desk - LED lamp on left, incandescent on right |
Photos of the two lights I trialed, including the LED lamp I used in this project, and a photo of the desk with a piece of DIN rail used to measure length and placement of the lamp.
 |
| Figure 2 - Trial of lamp placement using DIN rail |
Paper Tray - Top Drawer
The other photos in this article cover the construction of a "paper tray" which is designed to fill the top shelf of the field desk. I plan on keeping an A4 notebook, CDR (with manuals), a couple of pens, etc in that shelf. The easiest way to achieve this is to have a drawer.
 |
| Figure 3 - Sheet metal cut out, prior to folding |
The paper tray is simply folded up from sheet metal (more of my salvaged colourbond "signwhite") to make a simple tray, with a folded top edge on three sides, and one extended edge on the front. This extended edge forms a handle which allows the drawer to be pulled out from the shelf.
 |
| Figure 4 - Drawer in place on shelf |
Since I haven't had the time to build a finger brake yet (still on the ever growing "things to do" list), I did all folds using the clamp over bar, wood and hammer method. One thing I found during that exercise was that you shouldn't hammer anything whilst you have a cold - all it does is screw up your inner ear whilst your sinuses are stuffed - Not a nice sensation.
 |
| Figure 5 - drawer painted |
Once folded up, a couple of pop rivets to hold it all together and then it's painted up in "Bender Grey". In fact the entire exterior of the desk will be painted "Bender Grey" and will carry a suitable theme in the trimmings.
 |
| Figure 6 - Finished drawer showing folded handle on LHS |
The painting and trim of the field desk itself will be the next article, then all that's left is a brief discussion about contents and that project is complete.


No comments:
Post a Comment